There aren’t that many people who feel comfortable replacing a part, or giving basic maintenance to a desktop PC, over the years PC parts have been made easier to be replaced, with only a few disassemble steps necessary to replace even the hardest component. Laptop computers have however been a no-go zone for many people who commonly replace PC parts, due to the complex disassemble instructions, higher risk of damage and general fiddliness due to the small parts. This guide is mainly for people who are familiar with PC part replacement/maintenance but haven’t had experience with a laptop.
To start off, if your laptop is still under warranty, don’t bother, get it checked with the manufacturer, it’s not worth breaching the warranty.
This will only deal with disassembly as reassembly *should* be the same steps you took, backwards.
IF you are doing something simple such as replacing ram/wifi card, etc (in newer laptops you can also replace CPUs the same way), then you don’t need this guide, it should all accessible from under the bottom compartment(s).
We will be working with small screws, stubborn-but-fragile plastic parts, pastes, sharp metal bits and anything else you could possibly comprehend so we’ll need a kit that meets the demands.
The Tools:
A Pad (Write every step you perform down)
If you’re worried about electrical discharges then use a grounding strap
Various sizes of Phillips and flat head (slotted?) screwdrivers, though you will generally only need one once you get started
Thermal Paste (I recommend Arctic Silver)
Torch (Or a lamp) only if it is dark, you don’t want to clutter the workspace
Paper and pen
Tissues/Paper Towel
Spatula (You might get away with using a thin flat head screwdriver)
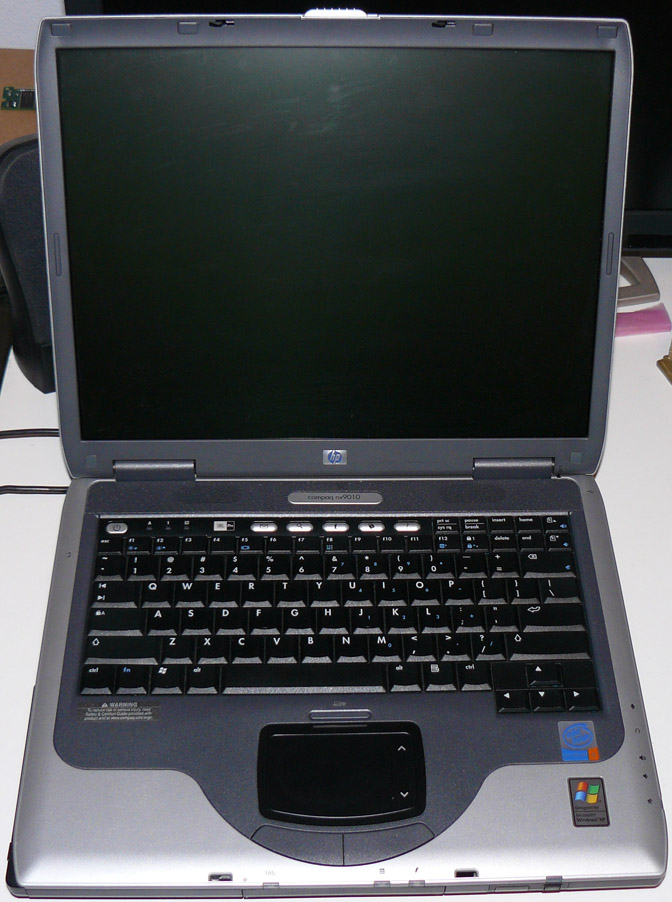
Now we can get started, you will be doing some work that involves that Laptop being on it’s cover, so lay something down that will not conduct static where it will be sitting so that you don’t scratch the cover on your desk. Turn your laptop over and lay it down on the table, make sure you remove any external power supply and peripherals.
Start creating a log in the notepad about exactly what you are doing, any problems experienced etc, YOU WILL FORGET what you have done previously so make easy to understand diagrams etc.
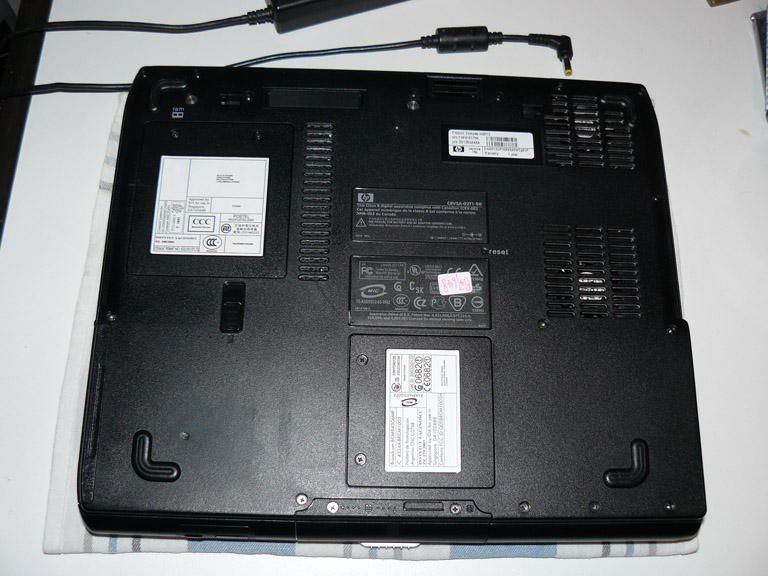
Once you have set this up the first item to remove is the battery.
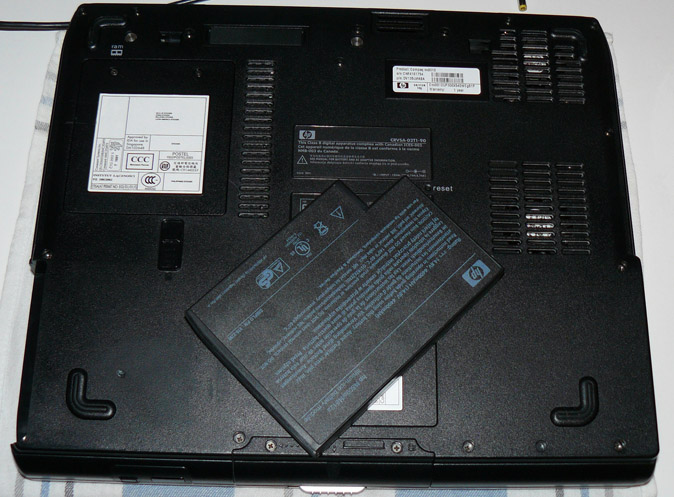
Put the battery in a safe spot, we will move to the disassembling stage, this stage is difficult to show you, seeing as all laptops are different, however if you have a HP/Compaq laptop from around 2003-2004 you should be fine following my instructions fairly closely.
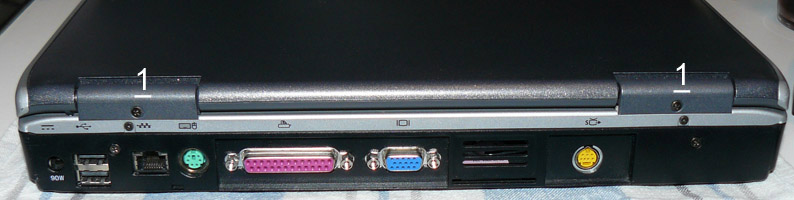
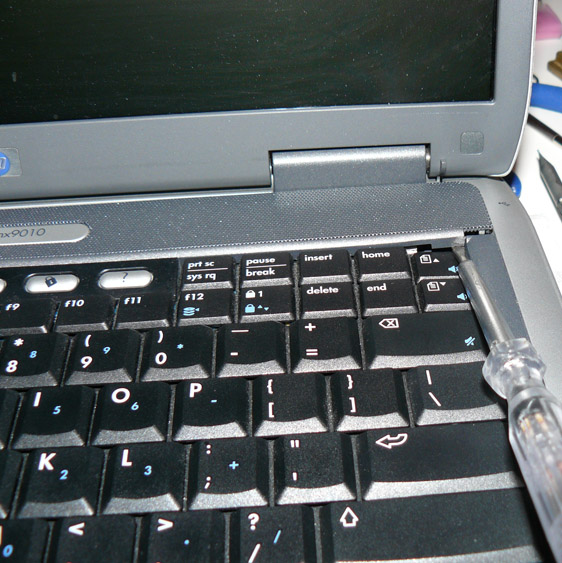
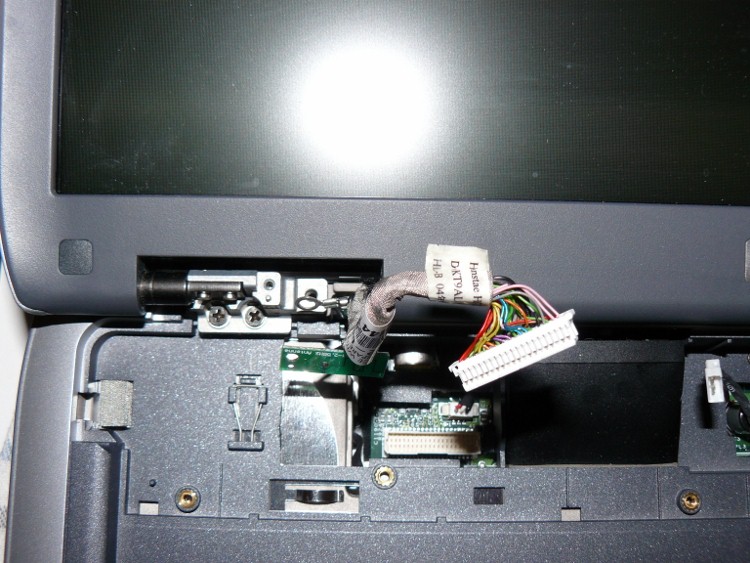
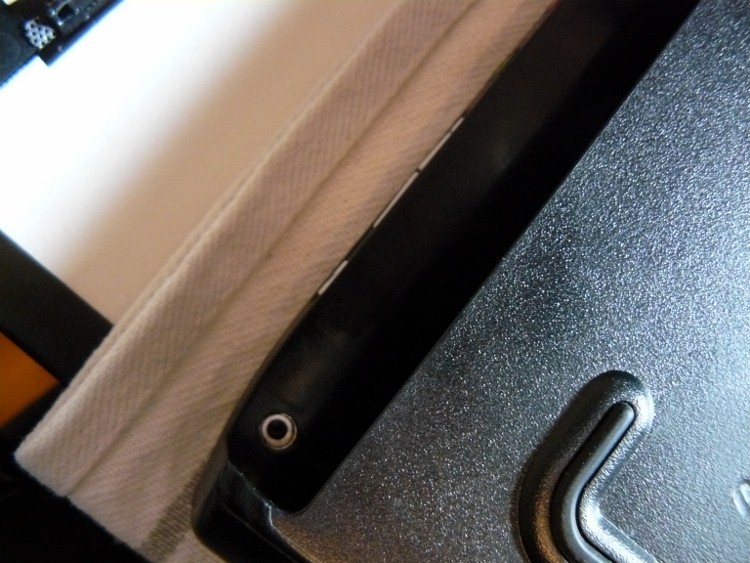
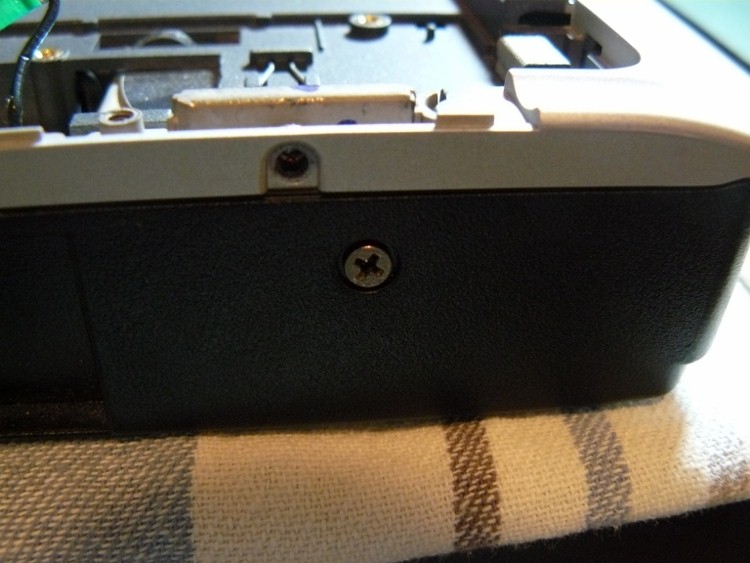
This model requires the keyboard cover to be removed, this is held down by 2 screws on the back panel on the hinge labelled 1, remove them and put them in a safe place, if you are like me and don’t want to lose screws, put their type and where they came from on a piece of paper and put them on or next to it.
Here comes the tricky part for a beginner, we must pry up the keyboard cover, the screwdriver will do, the manual says to start from the right corner to the left, there seems to be only an ease of prying reason as there’s really no difference from the left, the plastic hinge cover gets caught and usually needs to be pried from underneath upwards to come off, it comes off smoothly however, be careful and don’t rip it upwards straight away, some models like mine has the speakers attached to the keyboard cover and the cable is not long, we’ll deal with this next.
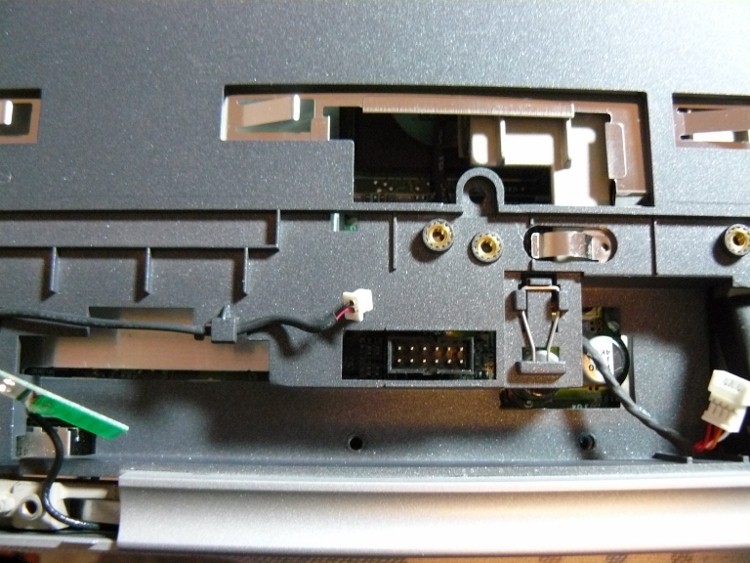
As you can see the speakers are connected currently, disconnect the cable at point 2 and put it in a safe place, now we must remove the keyboard, it’s held down by 4 screws at point 3, remove them and put them in a safe place.
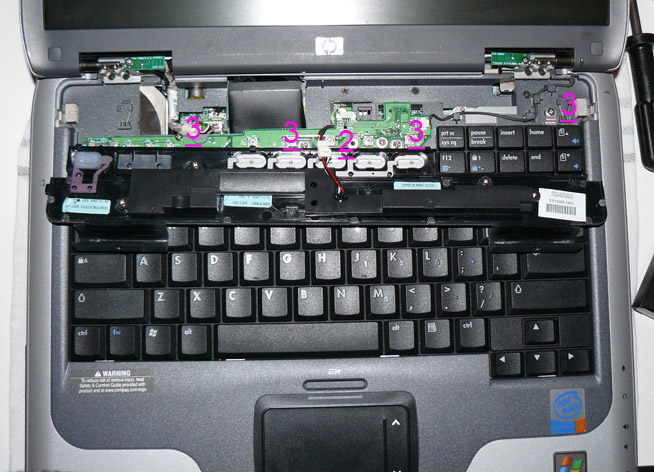
As you can see you can just lift the top of the Keyboard and will most likely flip over towards you, it may be attached by tabs on the bottom so pull it out, then flip it upside down to expose the keyboard cable, simply pull off the tabs and slide the cable out, then you can put the keyboard in a safe place, now is also a good time to give that keyboard a good cleaning.
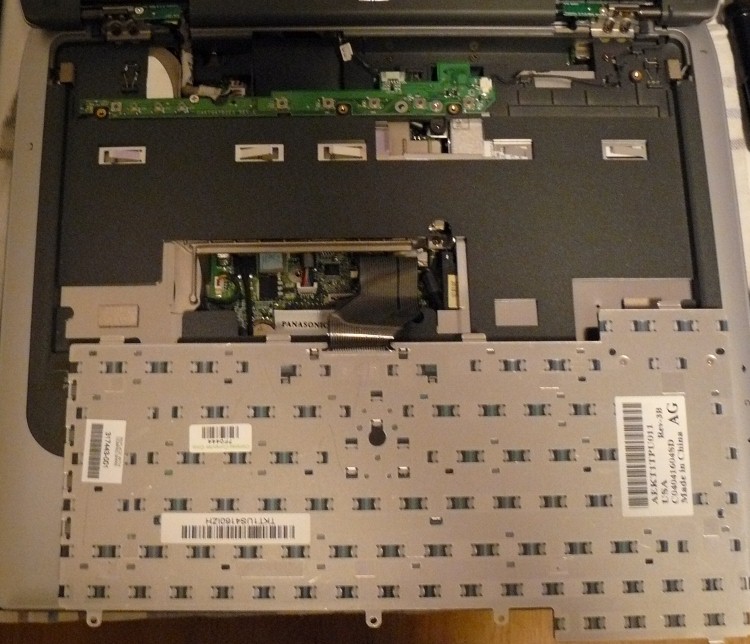
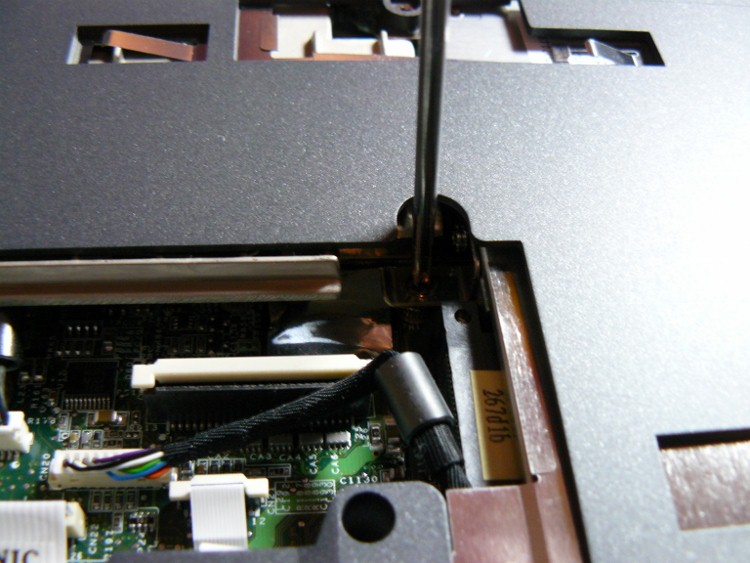
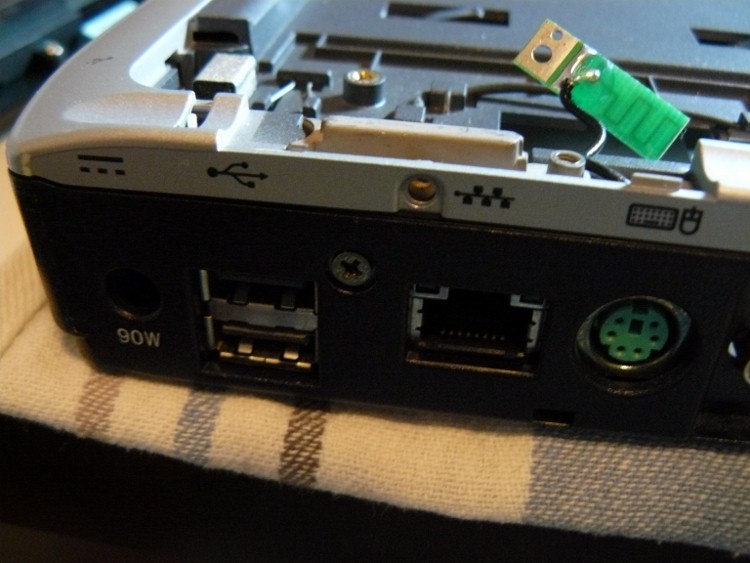
Sometimes you are left with smaller bits of board, in this case the IO board, this one was already loose, but if yours is not, unscrew any extra screws holding it down and remove any cables attached, make sure you keep note of where they plug in as some cables are the same sizes and plugging them into the wrong places later on can cause problems.
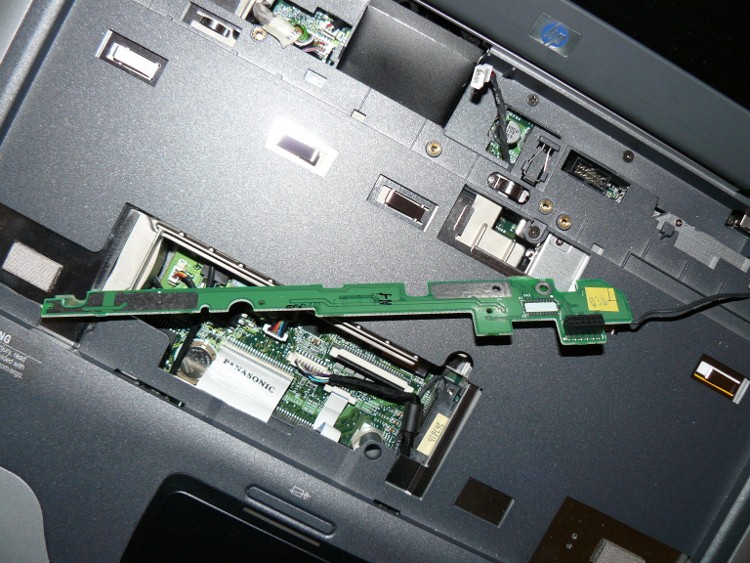
Now is usually a good time to disconnect the monitor cable and any wireless cables that go into the monitor as they can prove to be a pain later on if you don’t, if for any reason you can’t disconnect any of those yet on yours, simply wait until you can.
If you have been able to disconnect the wireless and display cables from the monitor when it can be removed to make a safer working environment, plus you may need to remove it anyway to get to some parts. Simply unscrew the screws (there are usually 4, 2 on each side) and remove the monitor, in this case I pulled upwards after unscrewing to remove it, again put it in a safe place NOT face down.

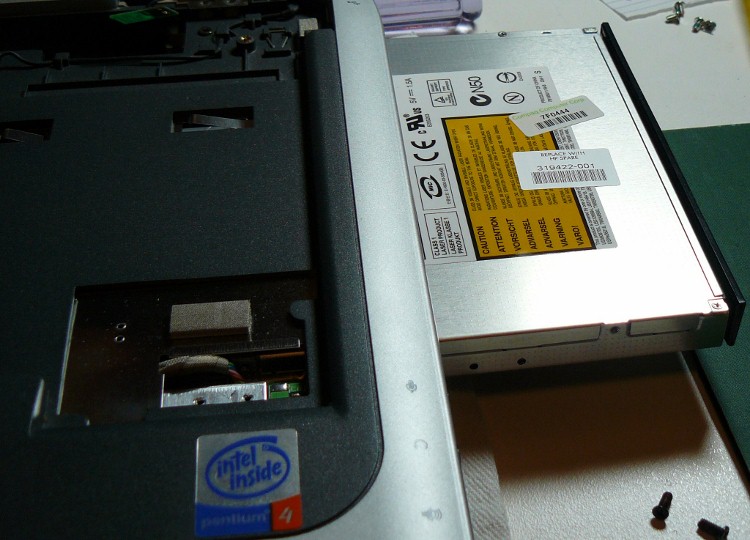
An important part of dismantling the laptop is removing the optical drive (CD/DVD Drive), it’s usually screwed in with hidden and/or hard to reach screws so it may take time to find them, you may have also removed them earlier as part of the back cover or keyboard unscrewing which means you have to take that in account when tracing back your steps later. Once you have removed the screws a careful push from the inside of the laptop on the drive should unplug and slide it out, remove it completely and we can continue.
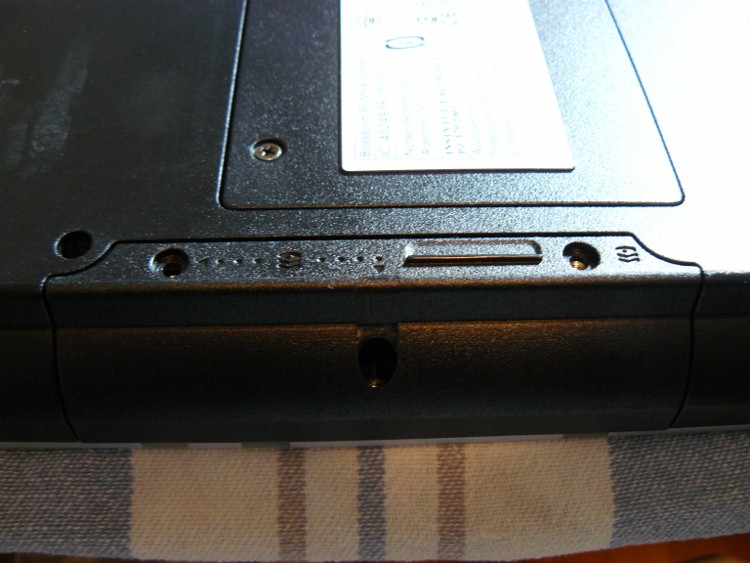
Removal of the hard drive, in newer laptops it is on the underside usually in the same compartment that contains the Memory and CPU area, in this laptop it is screwed in from the front, remove any caps covering the screws and unscrew the compartment.
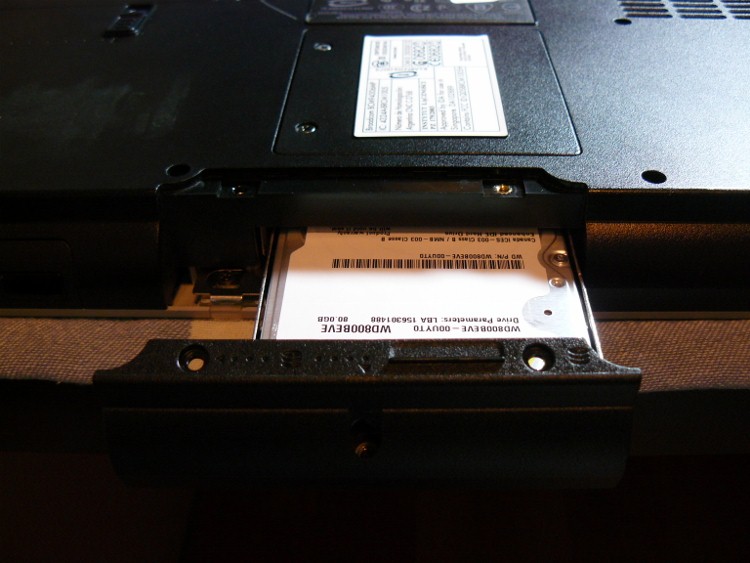
Once the compartment is out, you’ll notice it is usually a caddy for the hard drive that can be unscrewed, this is only necessary if you are planning on replacing the hard drive, simply unscrew the old one and screw in the new one facing the same direction as the previous one.
Turn the Laptop base upside down so that the bottom compartments show.
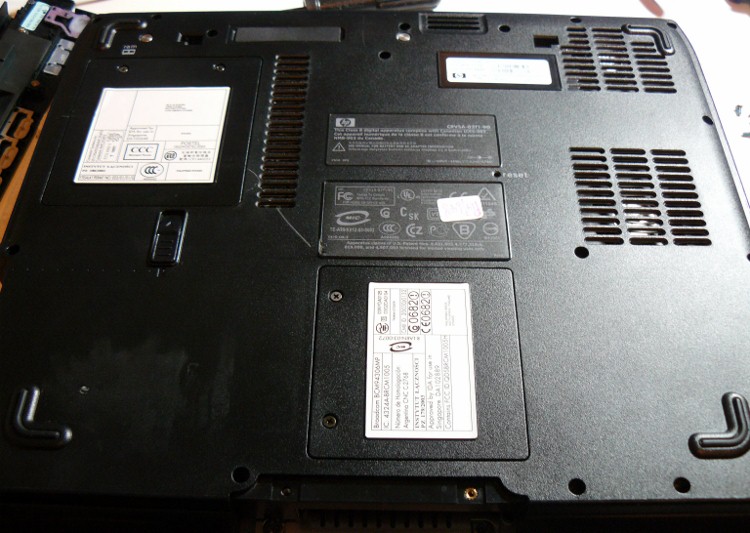
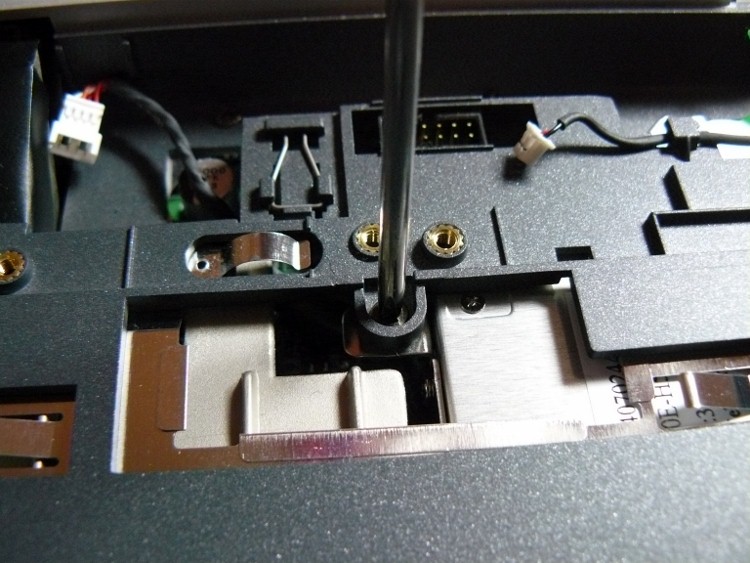
Remove each compartment, this is fairly simple, then remove all screws left on the underside of the laptop, usually screws are hidden in places like the battery compartment and where the optical drive was, sometimes in the hard drive bay also.
Next you must make sure no cables etc are connected to both sides of the case as they are about to be pried apart and cables catching on the plastic can cause problems, also keep note of where cables protrude from, you will need to know this when putting it back together.
Next you must pry the top of the case off the bottom, if you haven’t already done so put the base of the laptop right side up, then use a small spatula or other thin flat object to pry the them apart, this one has no visible clips but if yours has some that you can see then try unclipping those first, this is a very delicate process so be extra careful.
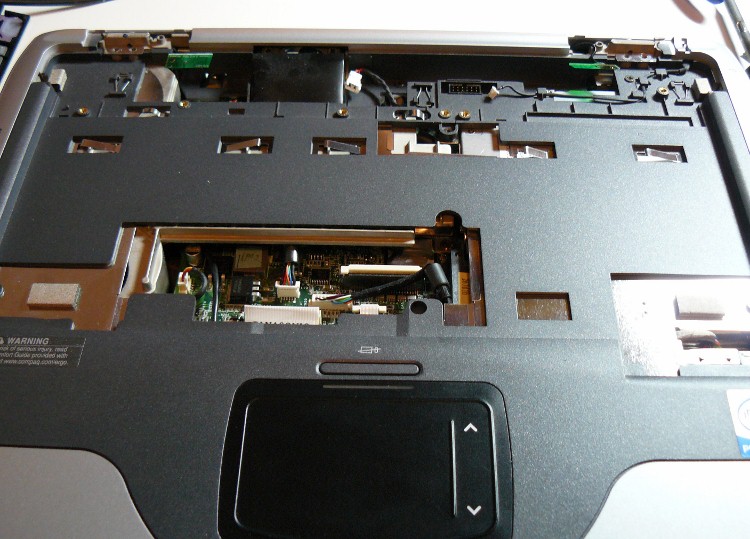
Once you have done this you should be able to pull the top cover off completely and put it away for now.
Most of the work is now done, you should be staring at the laptop’s mainboard/motherboard.
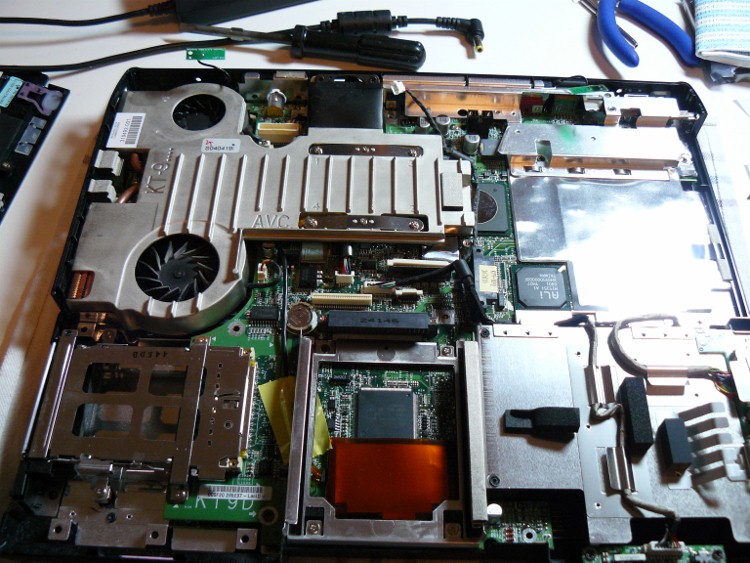
If you intend on cleaning the fans or redoing the heatsink’s thermal paste, make sure you do not damage or remove any pads that you cannot replace yourself, chipsets are usually cooled by thermal pads rather than paste and you will have to pay for a new pad if you remove it as it can’t physically be cooled once the heatsink is put back on (due to the gap between the heatsink and chipset when pad is removed).
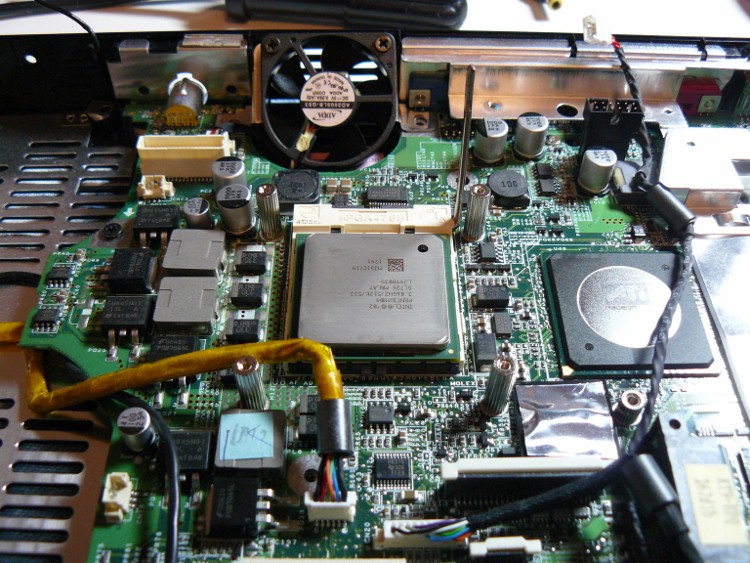
Apart from that removing the heatsink/fan assembly is usually done by removing 3 or 4 screws from around the CPU and maybe 2 or 3 more around the chipset, after this a good method is to slowly wiggle the heatsink is order to loosen the paste/pads from the CPU/Chipset, then slowly pull it off, make sure you unplug the fan(s).
Advice about cleaning fans is widespread on the internet so I will leave it up to you to choose which method is best to use.
Clean, replace paste and you are ready to put the heatsink back on.
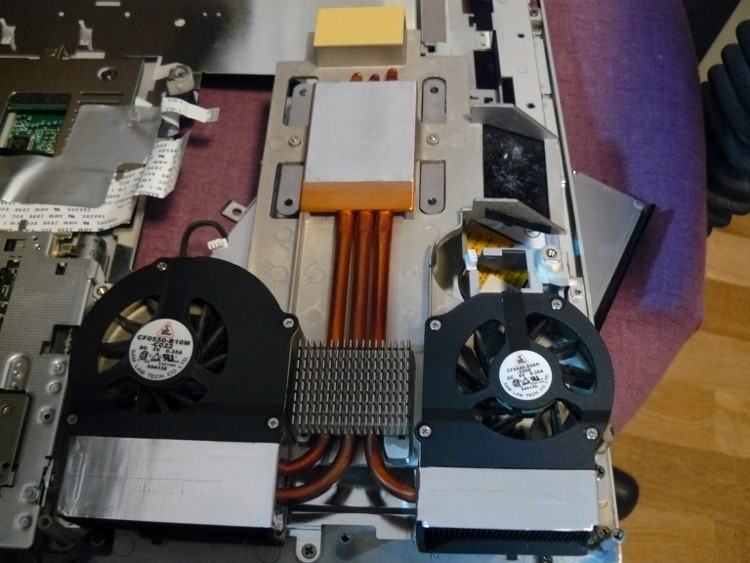
Sit the heatsink in it’s place like you would normally do on a PC, then slowly screw in the CPU screws one by one in a cross pattern (screw in first screw, then screw in opposite corner, repeat), these are usually on springs so they will slowly get tighter, be very careful, once they get tight then stop, there is no need to screw these screws in as hard as you can as you may crush the components underneath. Don’t forget to put in the other heatsink screws, and plug in the fan(s).
The next step is reassembly, trace back your steps, if something won’t go where you want it to, then you did it wrong, go back a step or two and consult your notepad.
A note before I finish up, I may be able to help you with small problems faced with disassembling and reassembling your laptop, but if you mess up and can’t find a screw/break a clip or other small object then I can’t help you much except direct you to eBay, if you face a major problem such as forgetting major steps I probably can’t help you there either, you were warned about the dangers of doing this and you were advised to keep an accurate log of your steps.
I have disassembled my HP nc2120 laptop prior to reading your instructions but following HP’s manual. I’ve removed the battery, disassembled the hard drive, removed the external memory module, mini PCI communications module, optical drive, keyboard, but was unable to remove the switch cover and the led board because I don’t have the screwdriver,removed the fan and heat sink and cleaned them both. Removed the processor, didn’t remove the modem (because of the switch cover), removed the internal memory module and the RTC battery and tried removing the top cover but was unable (but I tried) because of the switch board and when I was screwing it back one screw was unable to hold tight and later some plastic fell out from the laptop. I didn’t replace the paste between the processor and the heat sink.
When I completed the reassembly step by step and tried to turn on my laptop it just won’t. When I press the power it starts the fan for a second and when I press it once more and it begins to start but after a second or two it dies.
Is there something I could do to resolve this problem?
Mine does that if i don’t have the RAM seated correctly, other laptops sometimes do that if the processor isn’t seated correctly or the heatsink isn’t on tight, it all depends on what specifically it’s having an issue with and what the laptop does to deal with it.
What kind of paste was on the processor? Sometimes there is just a pad, sometimes there is a pad and paste, I recommend if it had a pad with paste smeared on the pad to replace that paste as bad contact with the CPU can cause them to shut down the laptop if there’s a chance it will overheat.
As long as the laptop is physically together, I don’t think plastic falling out of it could cause much trouble unless it has damaged something or got stuck in a fan as most of it is just cosmetic and the rest is only there to make sure everything fits in.
My suggestion would be to go over the CPU/RAM, make sure everything is seated correctly and try again, make sure you try plugging it into the mains power if you haven’t already and try without the battery.
If that fails to bring it back, then try disassembling/reassembling the whole thing but make sure you have the proper tools so you can look into where the plastic came from.