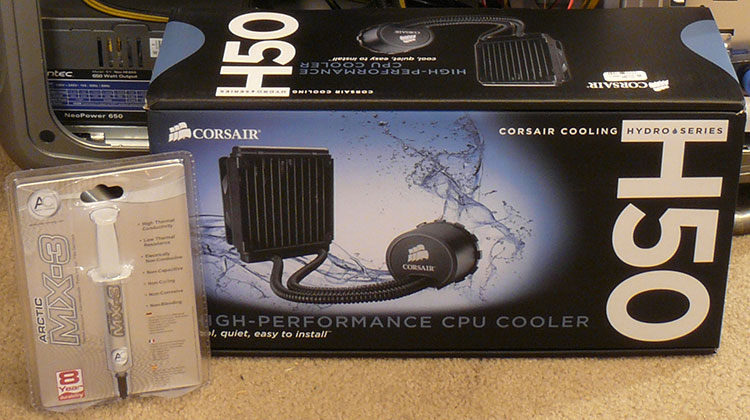
I purchased the Corsair H50 Cooler while it was on sale, normally it is slightly more expensive than even the top end air coolers, however in this case it was slightly cheaper than a few more popular coolers, a week later it arrived, along with some Arctic Cooling MX-3 thermal paste, I figured it would be a good chance to try some new thermal paste since I have been using Arctic Silver for at least the past 5 years, this will naturally skew the end results, but this is more about correctly upgrading cooling solutions than about exact cooling comparisons.
I cooled the room down to 25 degrees Celsius, checked idle and load temps using Real Temp, then started work on the replacement.
Due to the lack of light that day and the glare caused by flash I was unable to take photos at a constant rate due to me (still) not having a tripod, to get the images the camera was set on an 8 second exposure, it would have literally taken me all day if I documented the whole experience (see: nightmare).
I don’t have installation pictures but there are hundreds of others out there, including videos on Youtube, here’s how it went for me:
I always dread doing something major to my PC, there’s always a chance of breaking something, even when you are being very careful and you can’t really relax until it’s all done, I bought my Cosmos S case earlier last month due to my previous case (a silver ThermalTake Soprano) being way too small for the components I have, it’s much easier to work inside, however it is also significantly heavier, it probably should have come with wheels because carrying around that weight is a bit extreme.
After carrying the case into a much larger room than this one I removed the graphics card, the OCZ Vendetta 2 and finally the motherboard, this all went fairly smoothly, after cleaning the Arctic Silver 5 thermal paste off my CPU using Arctic Silver ArctiClean I then turned the motherboard over to remove the Force 2 Retention Bracket, unfortunately it didn’t want to come budge, this was strange to me seeing as I could hardly get it to stick when I installed it.
After getting underneath one of the corners and possibly flexing the motherboard past it’s design limit one of the corners came off, the rest came off by very carefully levering them off using a knife and the metal back plate it sits on, this left me with some residue that took a few minutes to clean off.
I was finally ready to install the H50’s back plate, however I was suddenly stumped because apart from the warning in the picture below, the actual installation instructions lacked a very important part of any instruction set, words, personally I expected a little more, for example there’s no real explanation of which of the four plastic clips to use on the top retention bracket, they have diagrams but they are very basic and my experience with Ikea furniture tells me just because some detail isn’t in a diagram doesn’t mean it isn’t in the thing they want you to use, so I looked at the 775 and 1156 instruction books, compared hem and figured it out.
You would think if they were able to print the socket types on each hole in the bottom retention bracket, they would be able to do it for the clips as well, I also ended up with 2 types of screws, 4 screws (they have a different, thicker thread) that are not even shown in the main instruction book didn’t fit anywhere, again checking with the socket AM2 booklet and bracket I figured out that they were specific to that bracket and didn’t need to be used. It’s not like I didn’t research either, I had watched many instruction videos, including the one on Corsair’s website but they just don’t go into that level of detail and once your computer’s off you have to rely on your own memory for any new information.

So once I figured out everything I needed to know I installed the bottom retention bracket, put the motherboard back in my case, screwed almost all of the screws in, experienced a failure of one of the risers on the case, so unscrewed all the screws again, had to remove it using pliers, find a new one and replace it. I was then able to reinstall the motherboard and was ready for the next bit.
I first removed the plastic surrounding the pump/water block and removed the preinstalled paste, that went fairly well so I went on to the next bit, Installing the radiator and fan was extremely easy and as the pipes are fairly short the whole thing must sit in the case, however the foam at the bottom of the package it came in was perfect for stopping the water block damaging the components on my motherboard, it ended up being one of the easiest fan installations I have experienced.
After installing the top retention bracket and putting the new MX-3 thermal paste on my CPU (this is more of a preference of mine to do it that way) I was able to install the water block, the pipes were much stiffer than I was expecting and I was quite worried about how far they could bend but I got it all in place, twisted the water block slightly a few times to smooth out the paste and tightened the screws one by one, another thing the instructions don’t mention is how far to screw them in, so I screwed them in until they were harder to turn and the water block could no longer move easily.
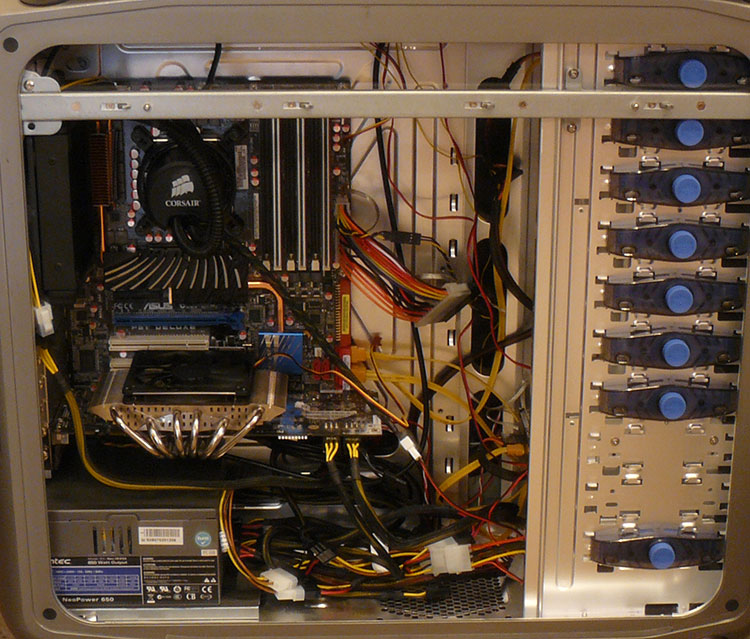
I then put everything back into my case and plugged it all in, 10-15 minutes of wrestling with the side panel and I also had the side fan in, when I closed the case up finally the pipes slightly rubbed up against the fan, however I have a newer Cosmos S that has the fan grill on the side fan, so no shattering fan blades for me.
Continue to the next page below